Quickstart
Use this guide to get your first project running in Opheleon.
1. Create or join an account
Your team admin will invite you to Opheleon. After accepting the invite, sign in and open your workspace.
2. Connect your tools
Connect integrations when they are relevant to your workflow. GitHub is useful when you already have an existing codebase that Opheleon should understand before planning future work.
You can also connect Linear or Trello if you want Opheleon to send implementation tasks into your team’s existing task tracker.
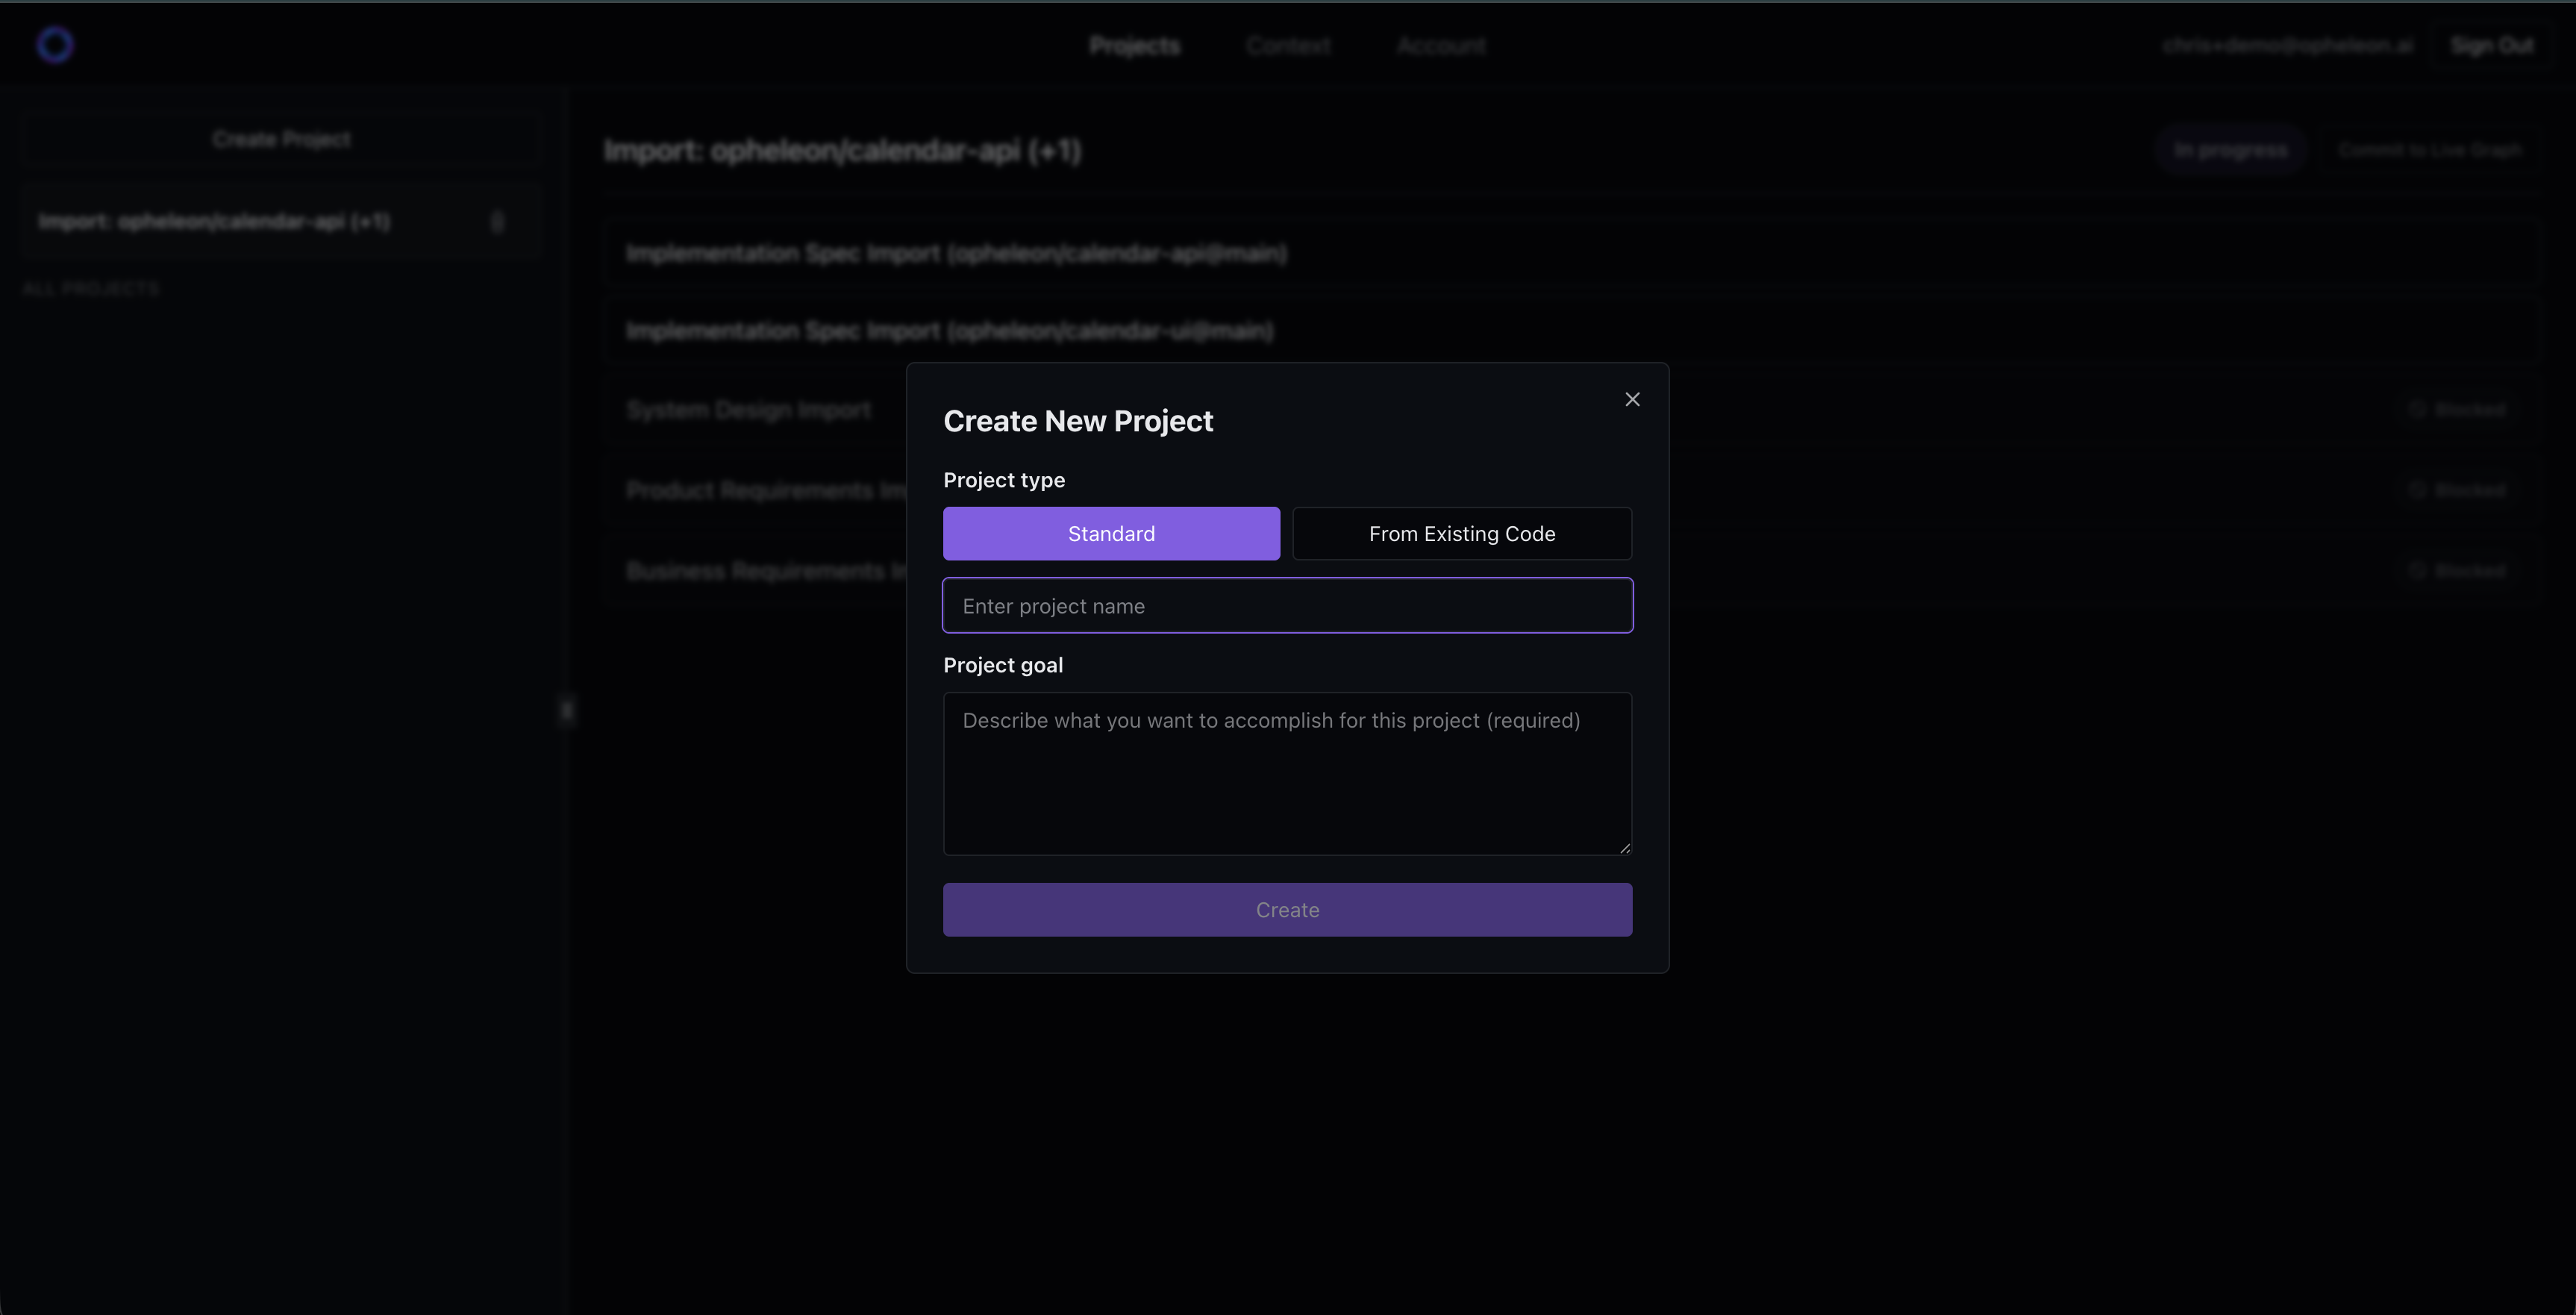
3. Choose a project type
Choose the workflow that matches how you want to start:
- Start from a goal for the primary Opheleon workflow: turn an idea into business requirements, product requirements, system design, and implementation specs.
- Import from GitHub when you already have existing resources and want to initialize Opheleon with codebase context before planning future work.
4. Review the generated drafts
Opheleon drafts each layer of the plan. Review the output, make edits, and approve the draft when it is ready.
5. Commit the documents
Committing saves the approved version of the document into the project history.
6. Generate implementation tasks
After the implementation plan is ready, Opheleon can create tasks in Linear or Trello so the plan turns into work your team can execute.
Quickstart project setup
Use the quickstart flow to create or join an account, connect relevant tools, choose a project type, and move through review.